BioHack Adcademy(BHA) 2022
A Personal Documentation of BHA 2022
Week 10: PCR Experiments
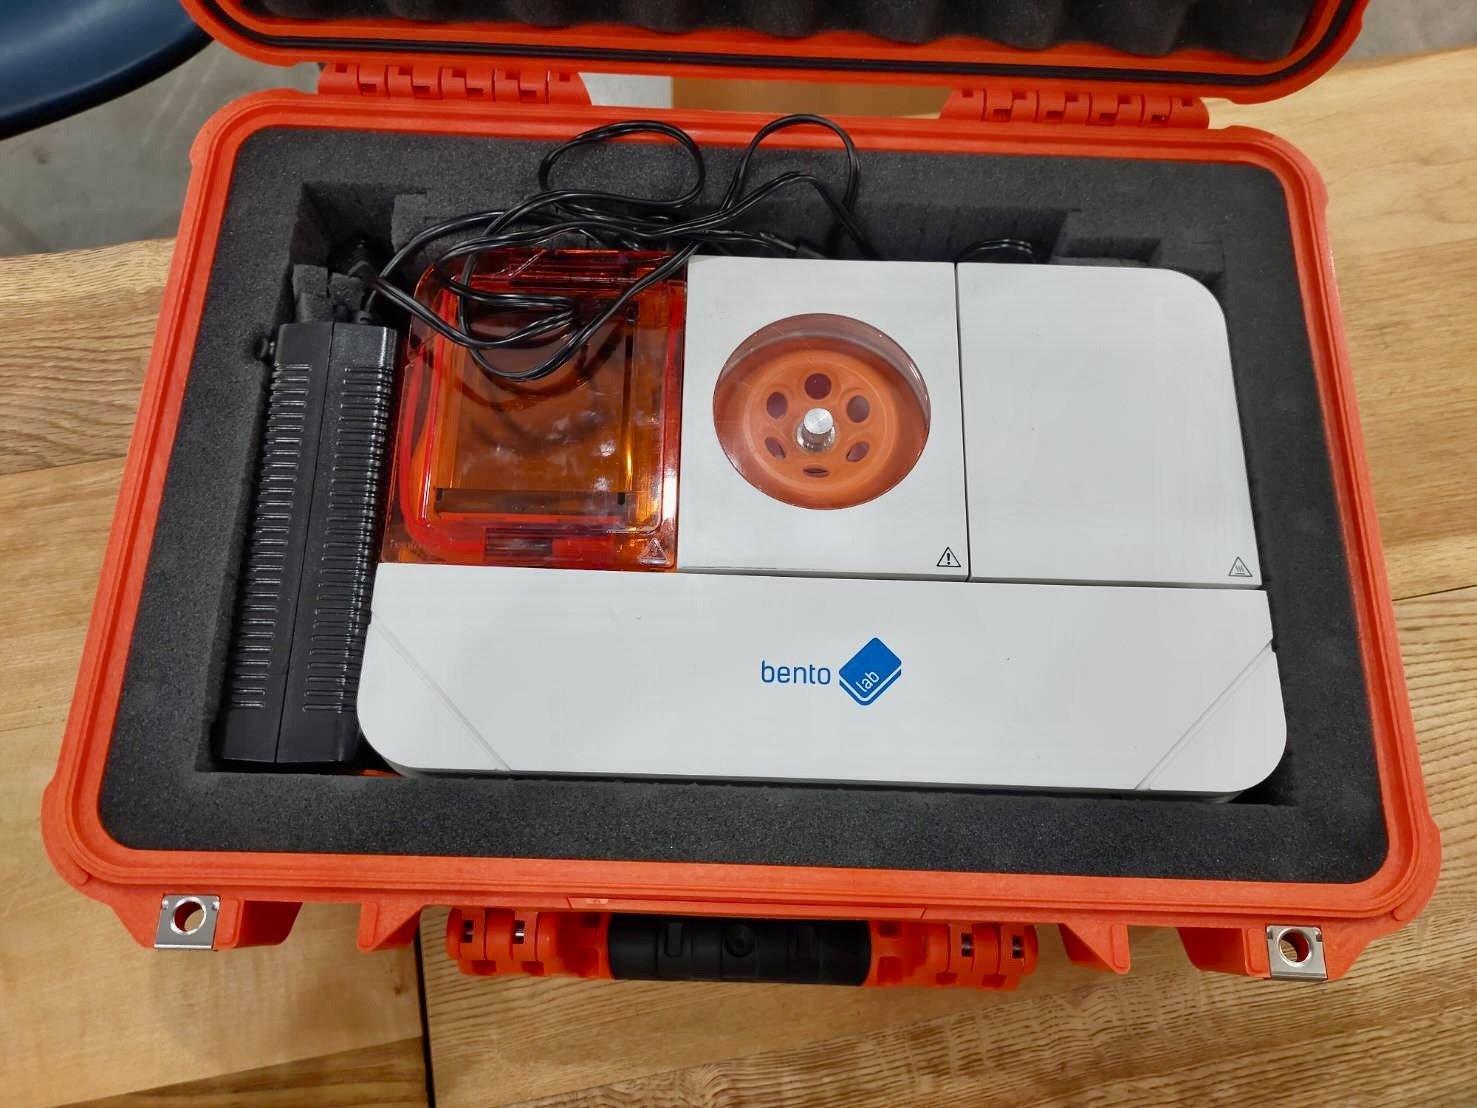
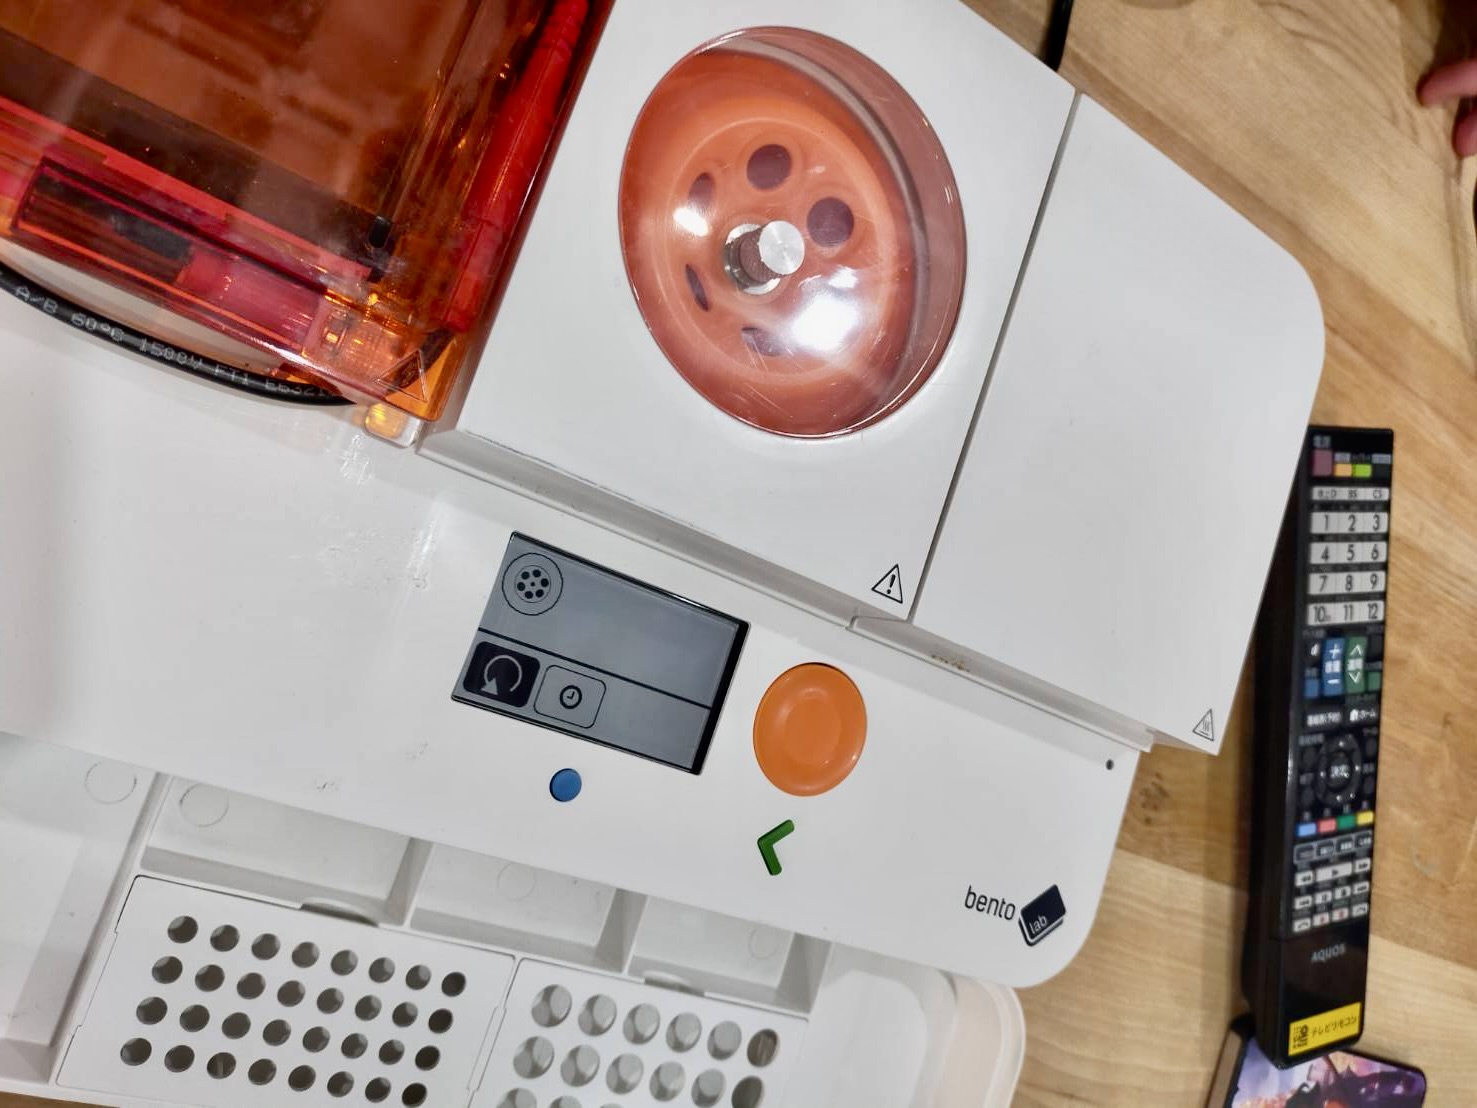
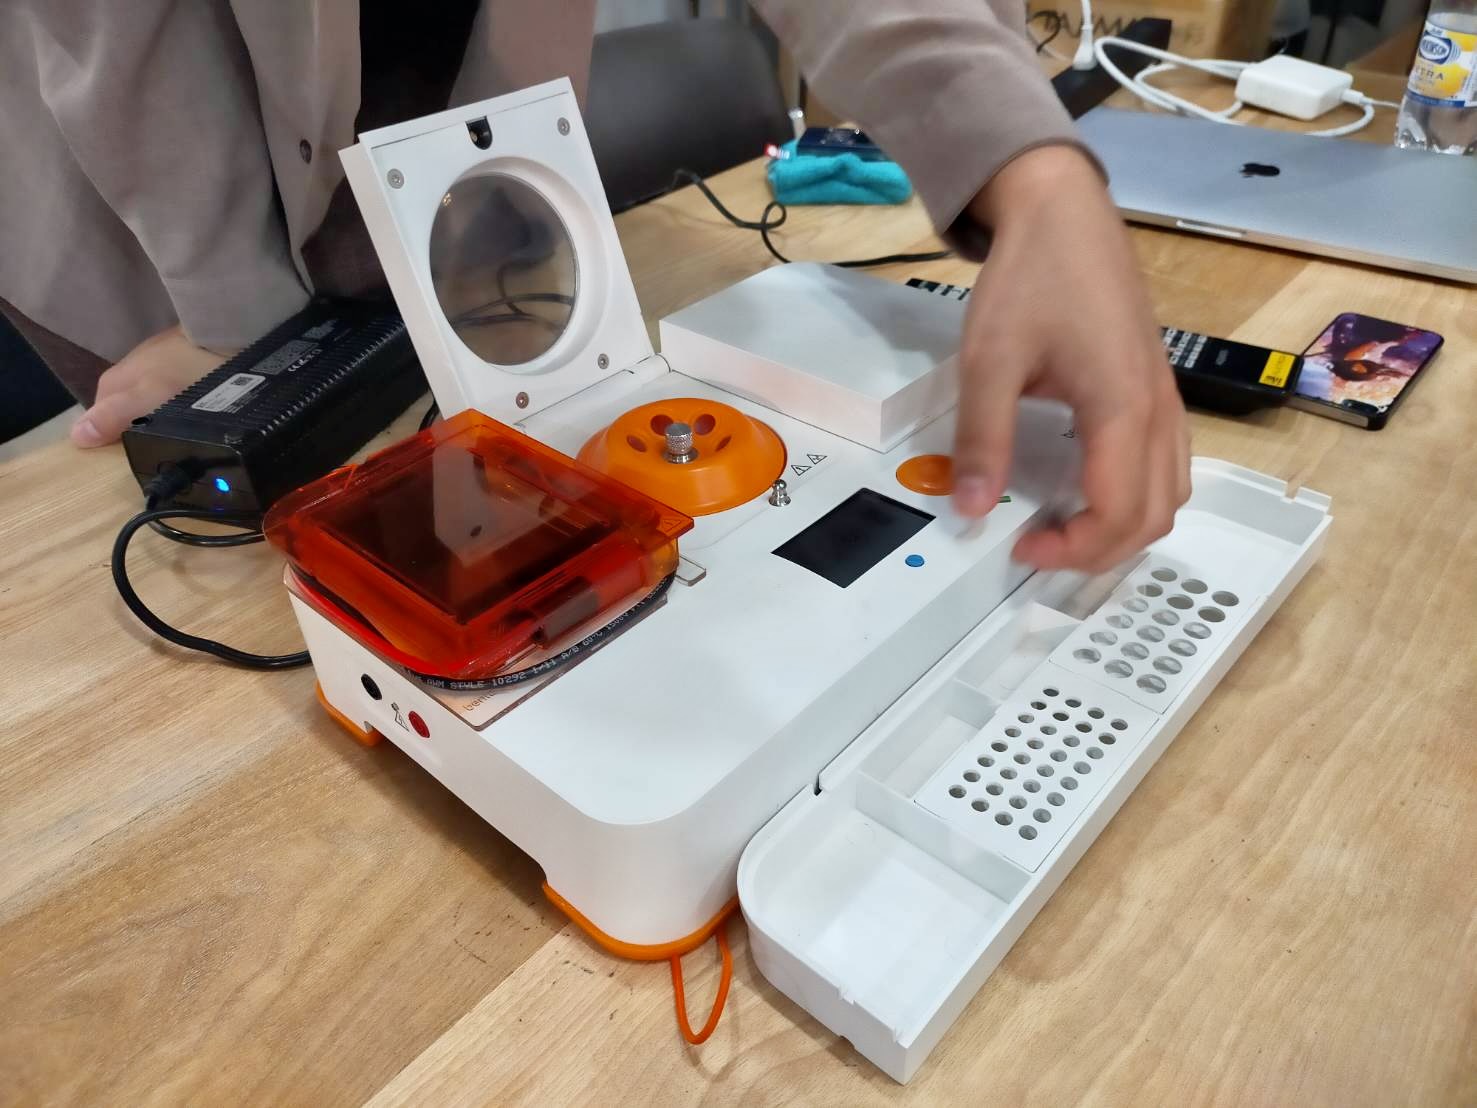
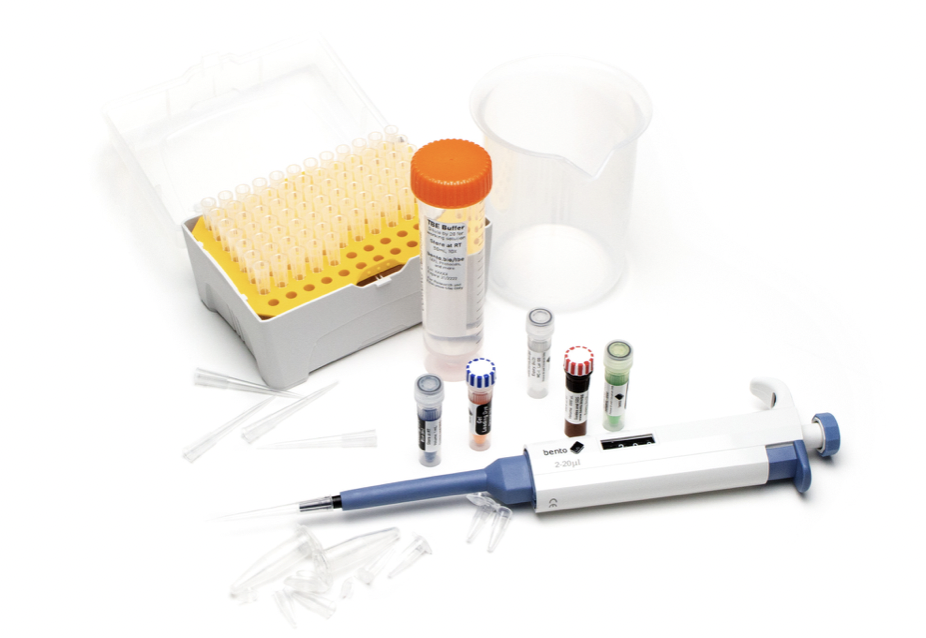
Bento Lab
Bento Lab Biotechnology 101 Kit
https://bento.bio/protocol/biotechnology-101/
DNA Extraction (From Saliva)
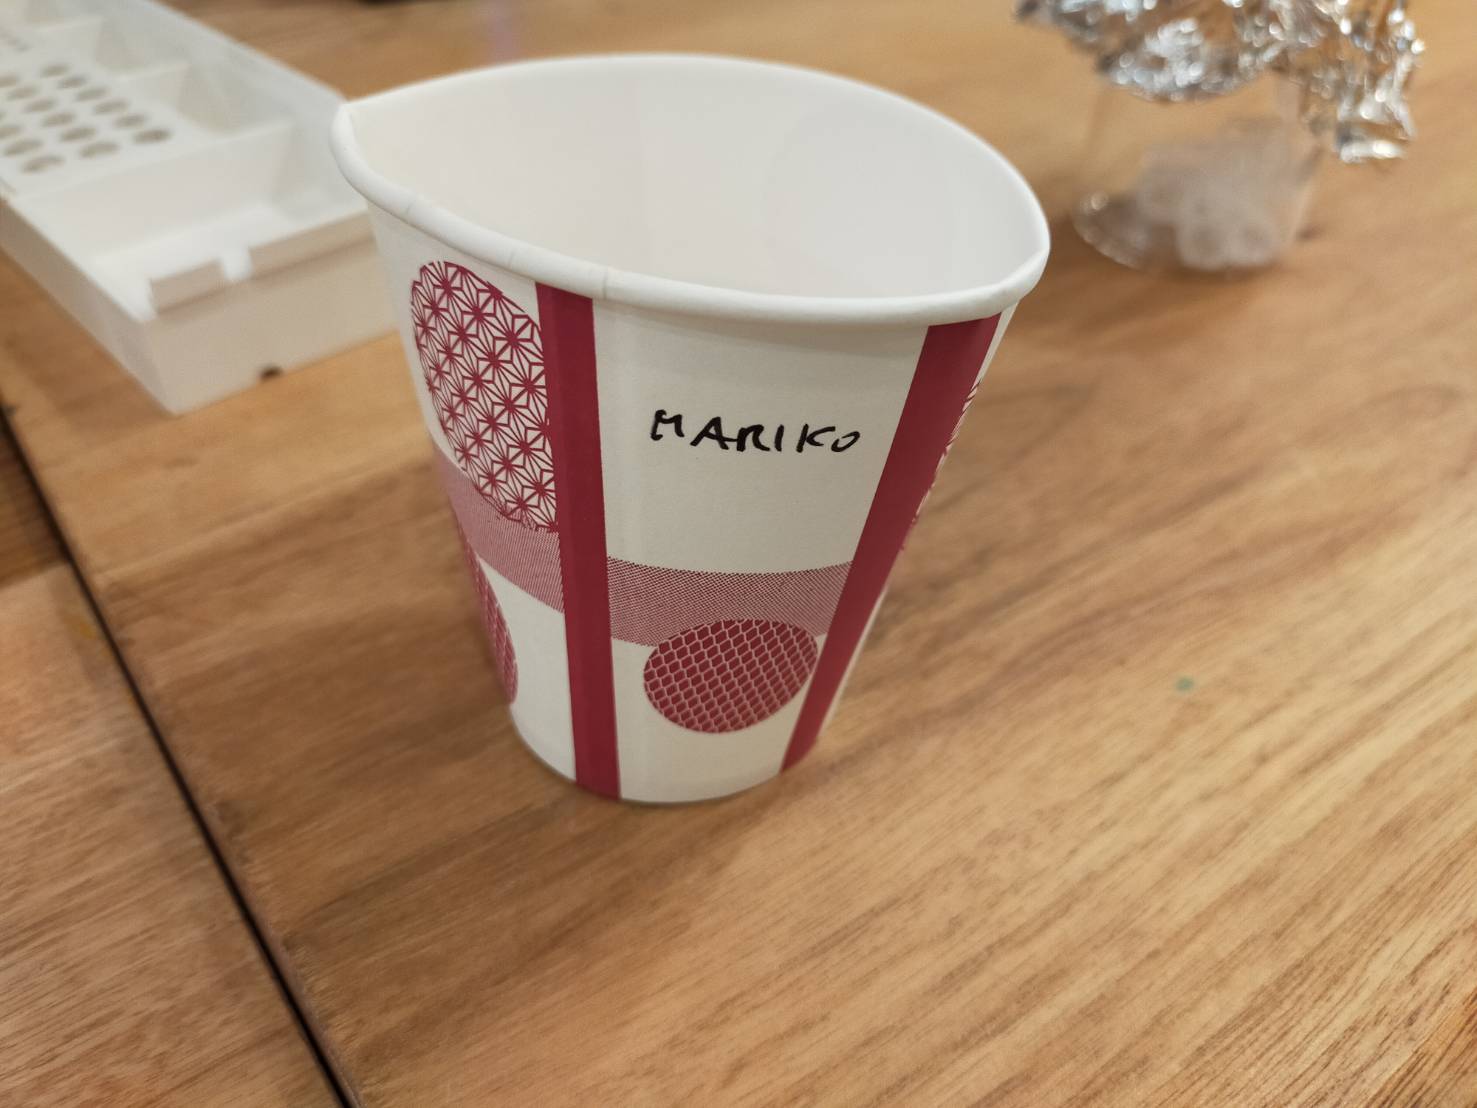
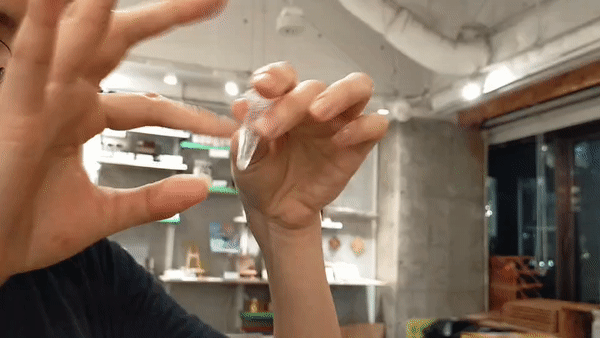
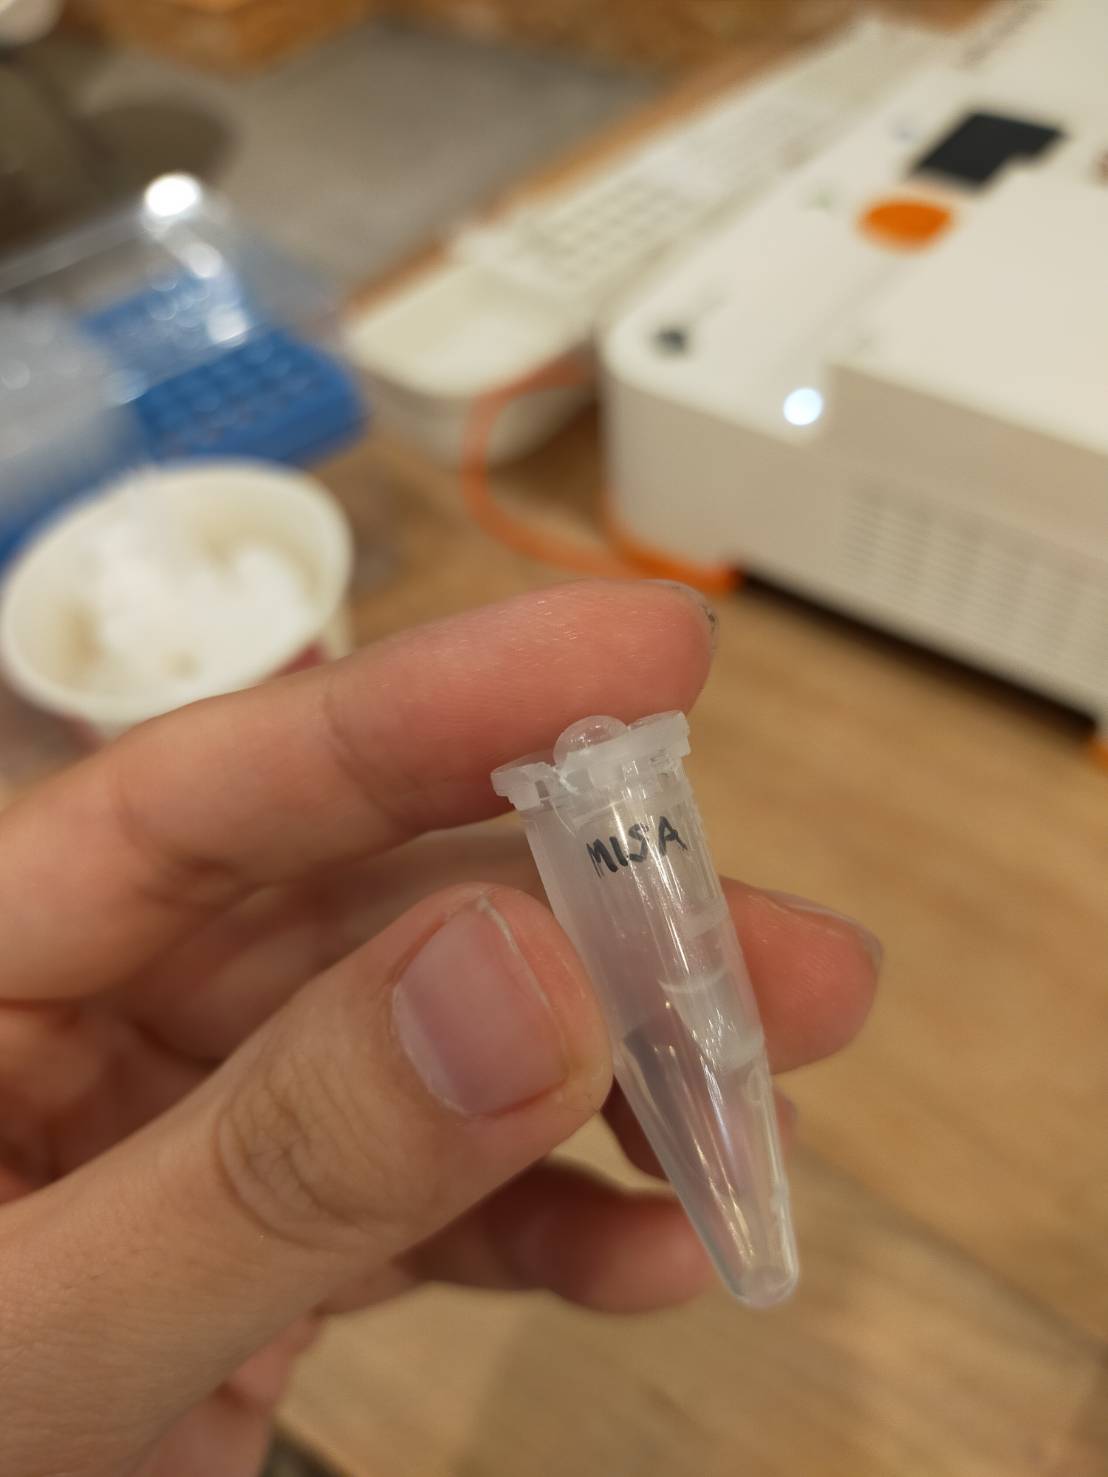
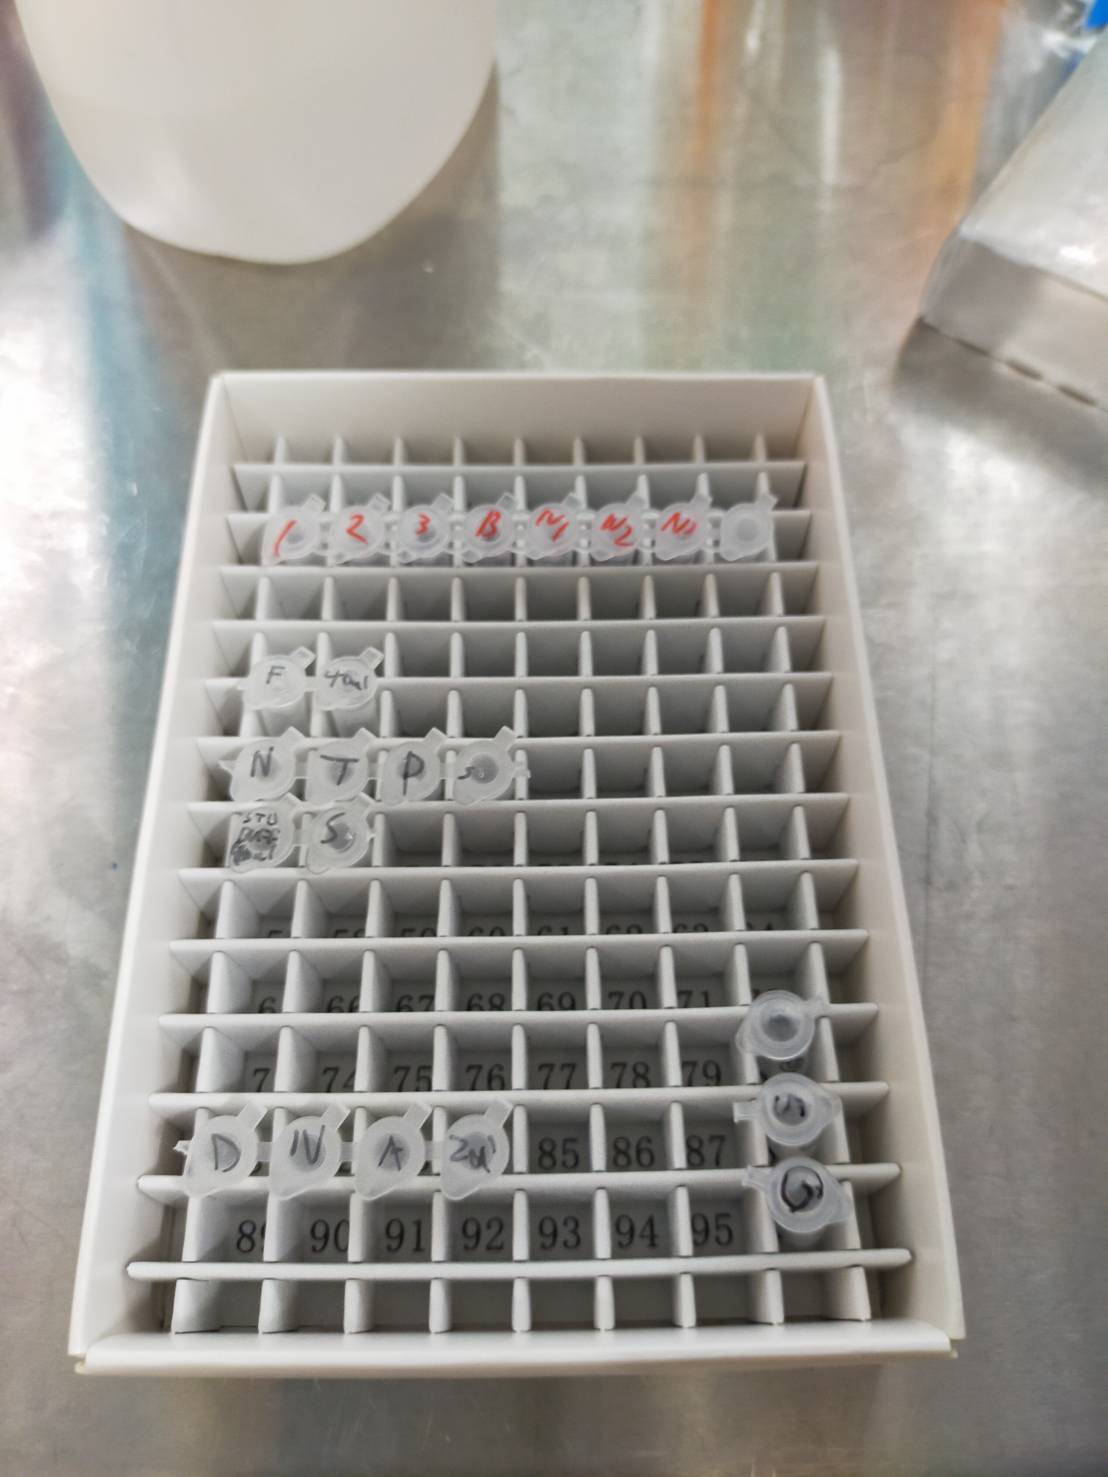
- 1.5ml Salva and label name on tubes
- Put pinch of salt into cup with water
- Gargling(30-60sec)
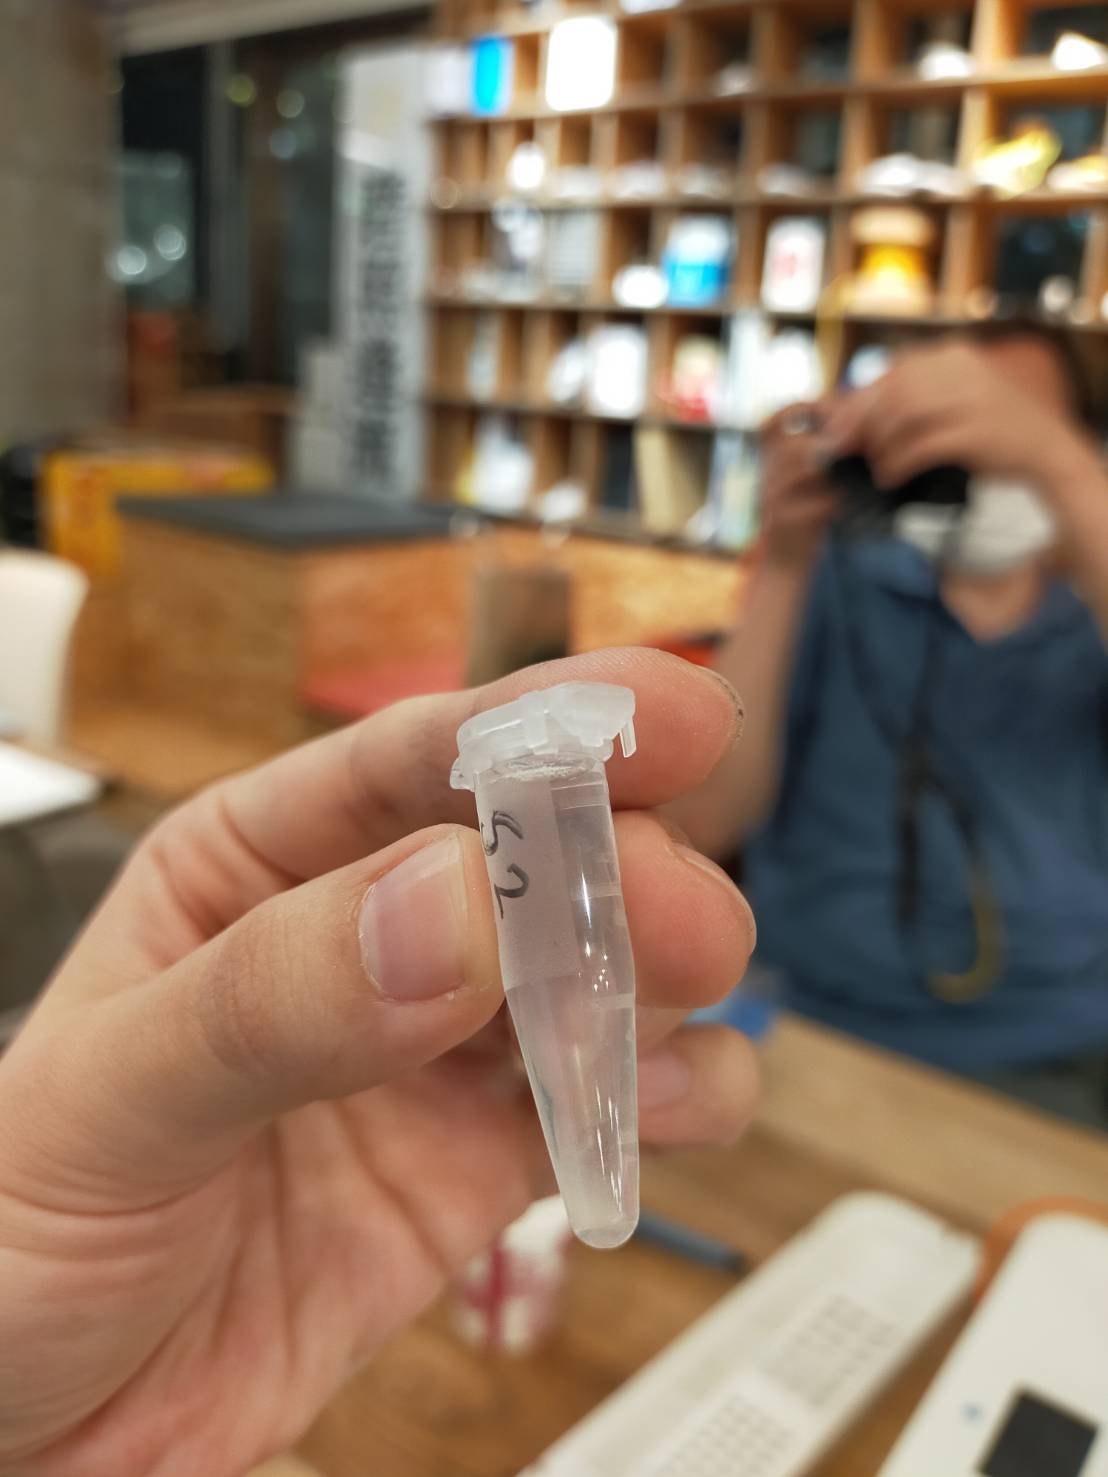
- Transfer 3. to 1.5ml tube
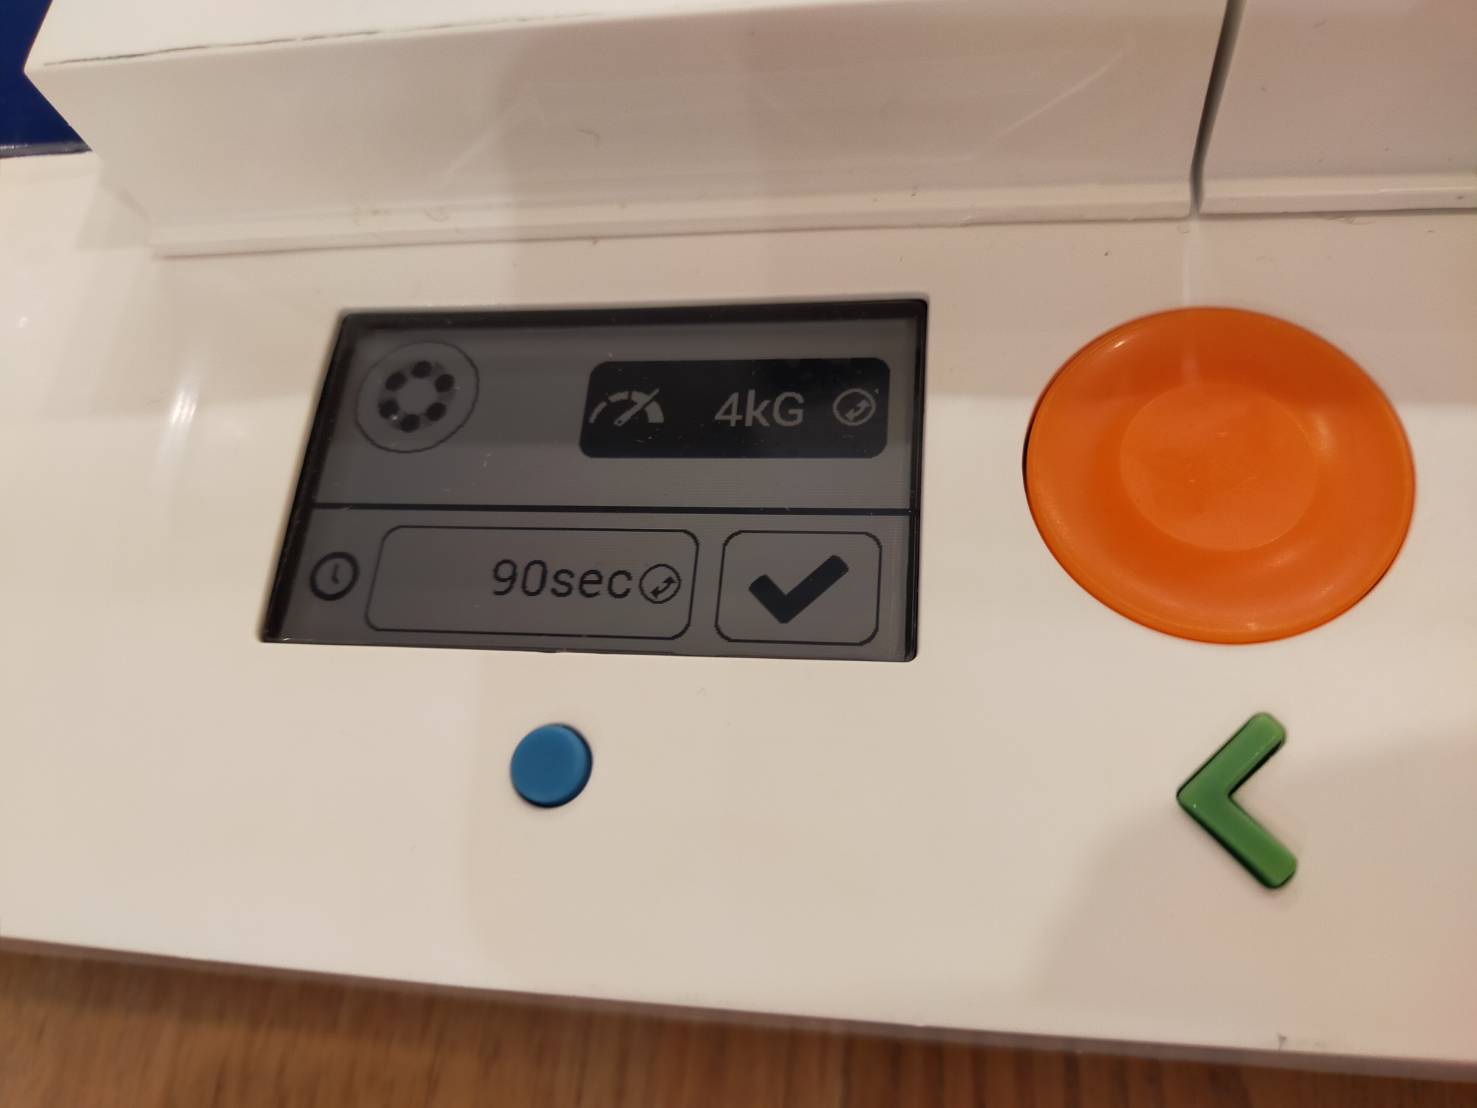
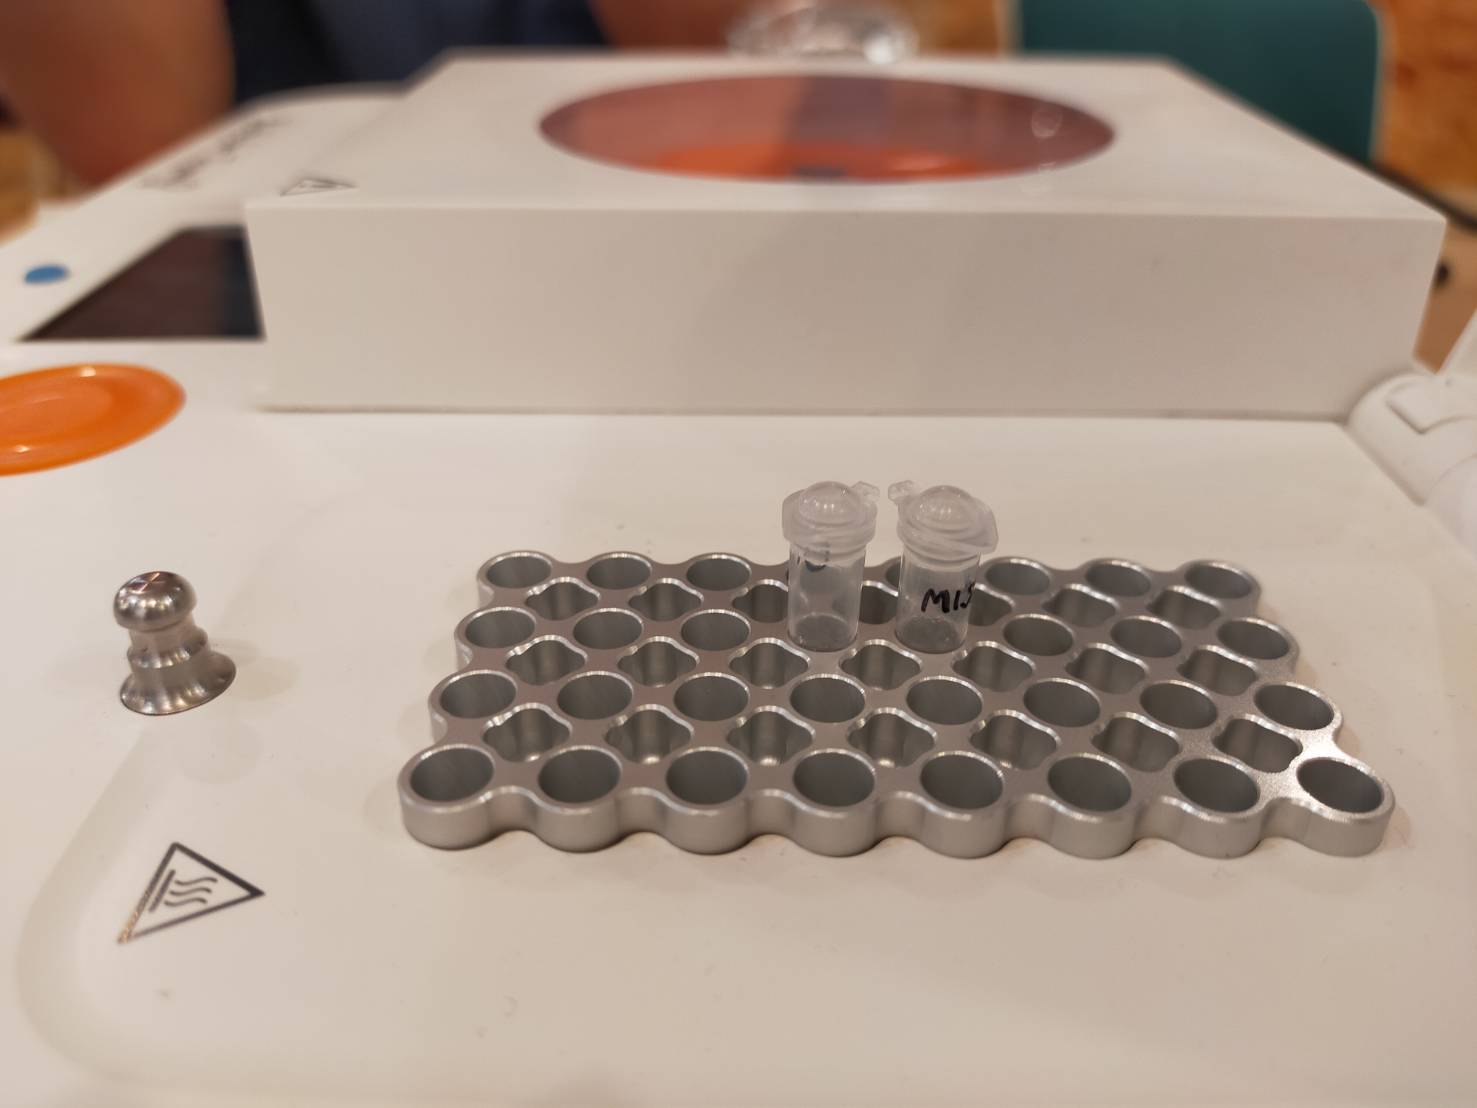
- Centrifuge(4,000G, 90sec)
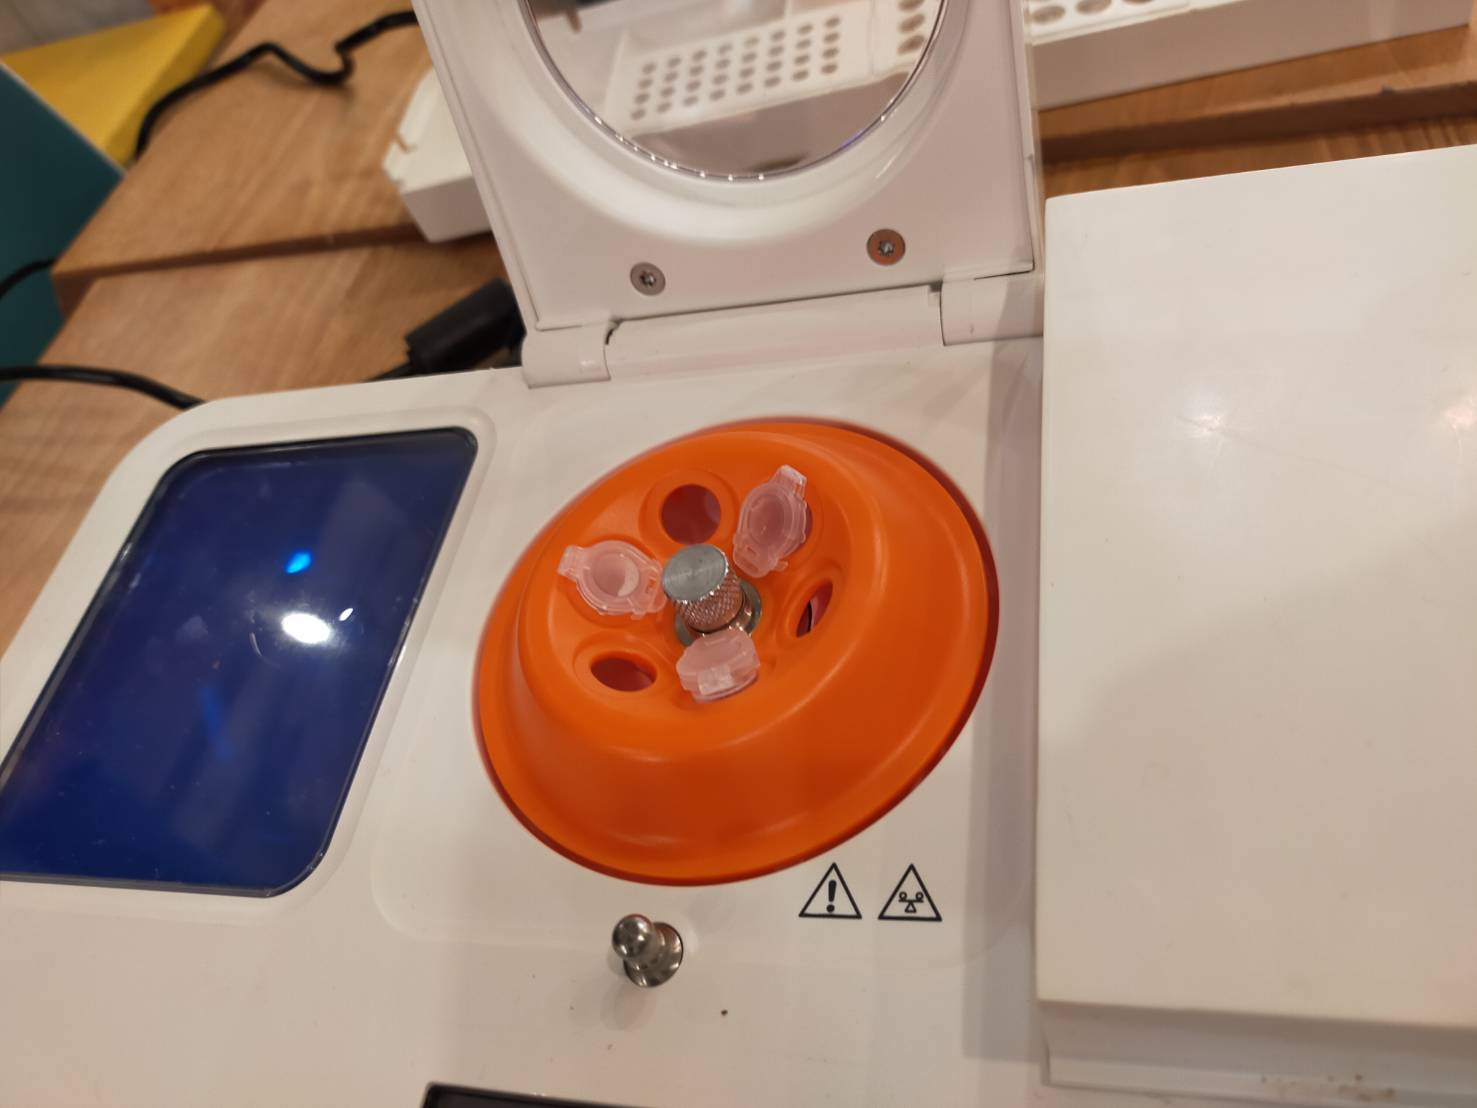
CAUTION: Be careful to the balance of tubes. It is dangerous if these are not put in the tube rod in well-balanced.
- Remove supernatant by decanting

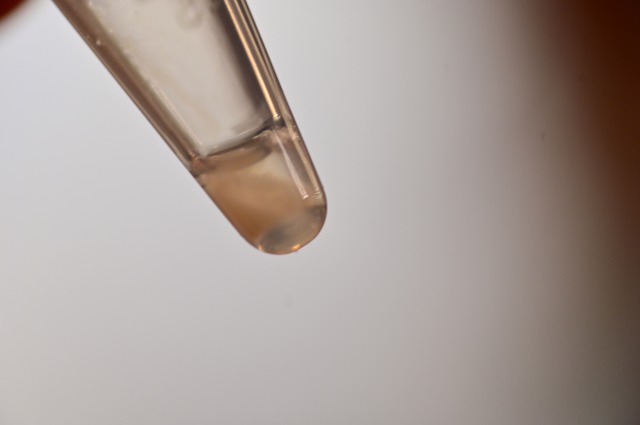
- Resuspend and flipping
Flip near the bottom of the tube with your finger.
It is also OK to thump it on the table.
- Transfer 7. to 200μl to PCR tube and label it.

- Heating these tubes in thermocycler of Bento Lab(90℃, 10sec)
- Mix by flipping
- Centrifuge(8000G, 90sec)
- Transfer supernatant to new PCR tube
Introduction to PCR
Reference
Equipment
- Bento lab only
Guide
1. What is PCR
PCR (polymerase chain reaction) is a method used in molecular biology to make millions of physical copies of a specific DNA sequence, for example, a gene.
“Primer” is a short single strand of DNA that serves as a starting point for DNA synthesis of a new DNA strand. It is required for DNA replication because the enzymes that catalyze this process, DNA polymerases, can only add new nucleotides to an existing fragment of DNA.
- First Step: Denaturing
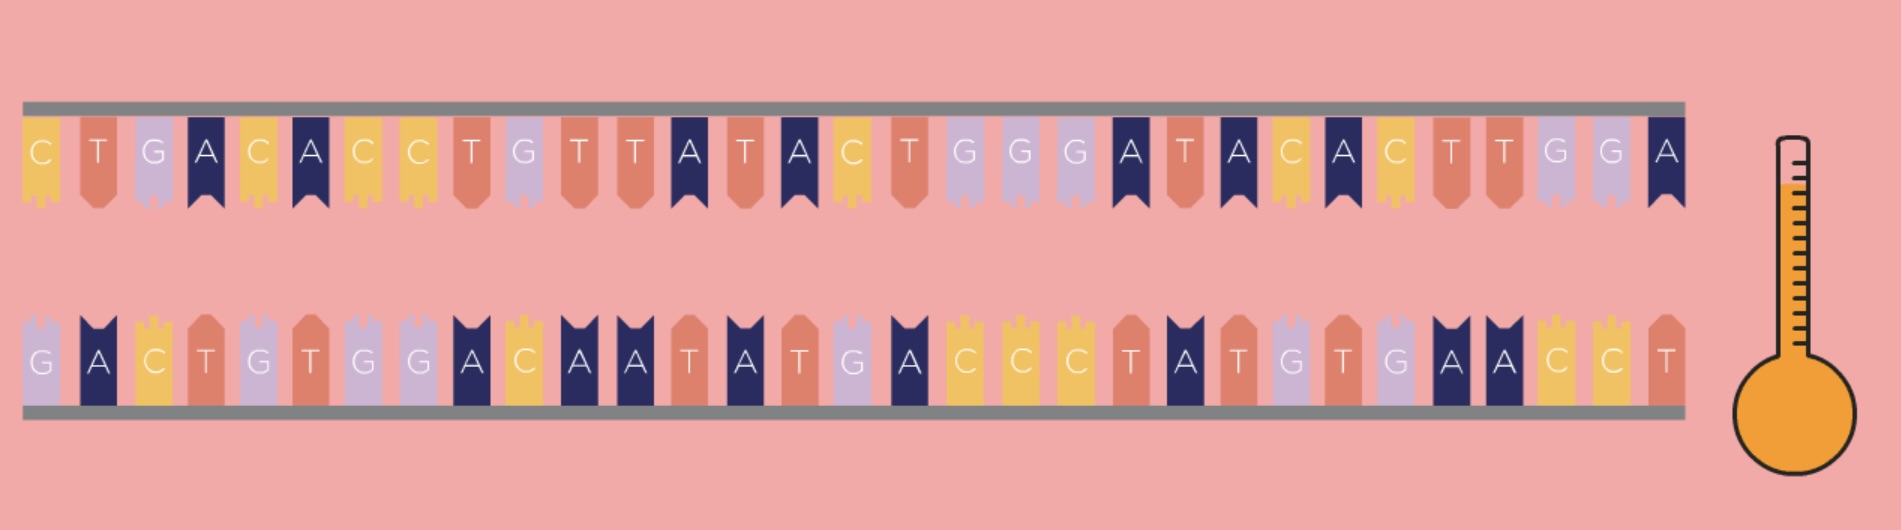
First, the DNA template is heated, which causes the double-stranded DNA to separate into two single strands.
- Second Step: Annealing
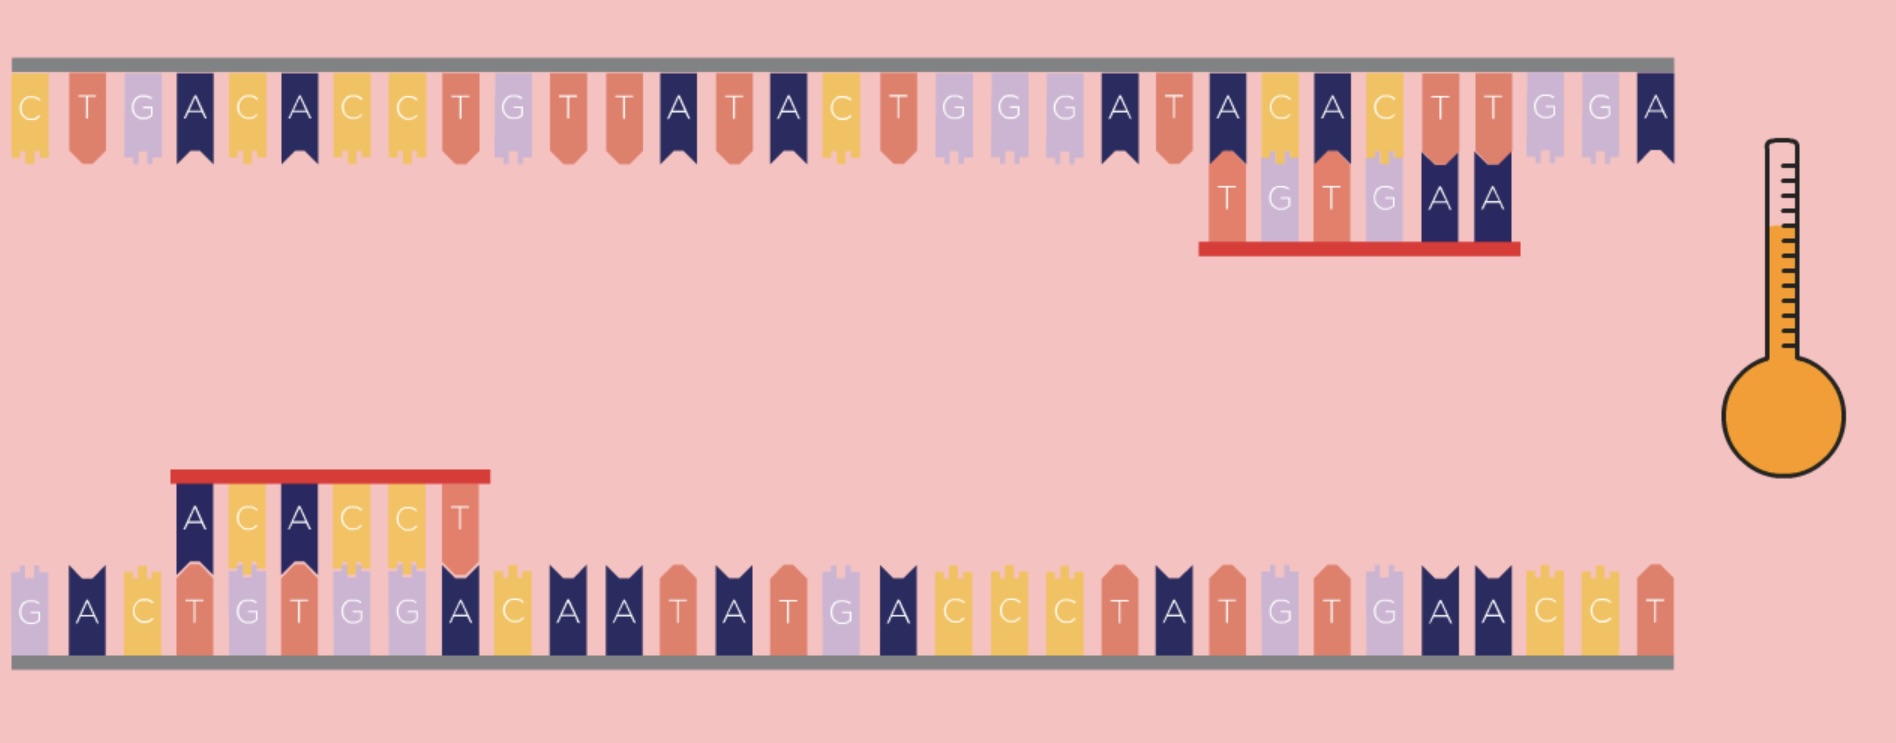
40-60℃: annealing temprature
At this point, the primers will attach, or anneal, to their binding positions on the single strands of the template DNA.
- Third Step: Extending
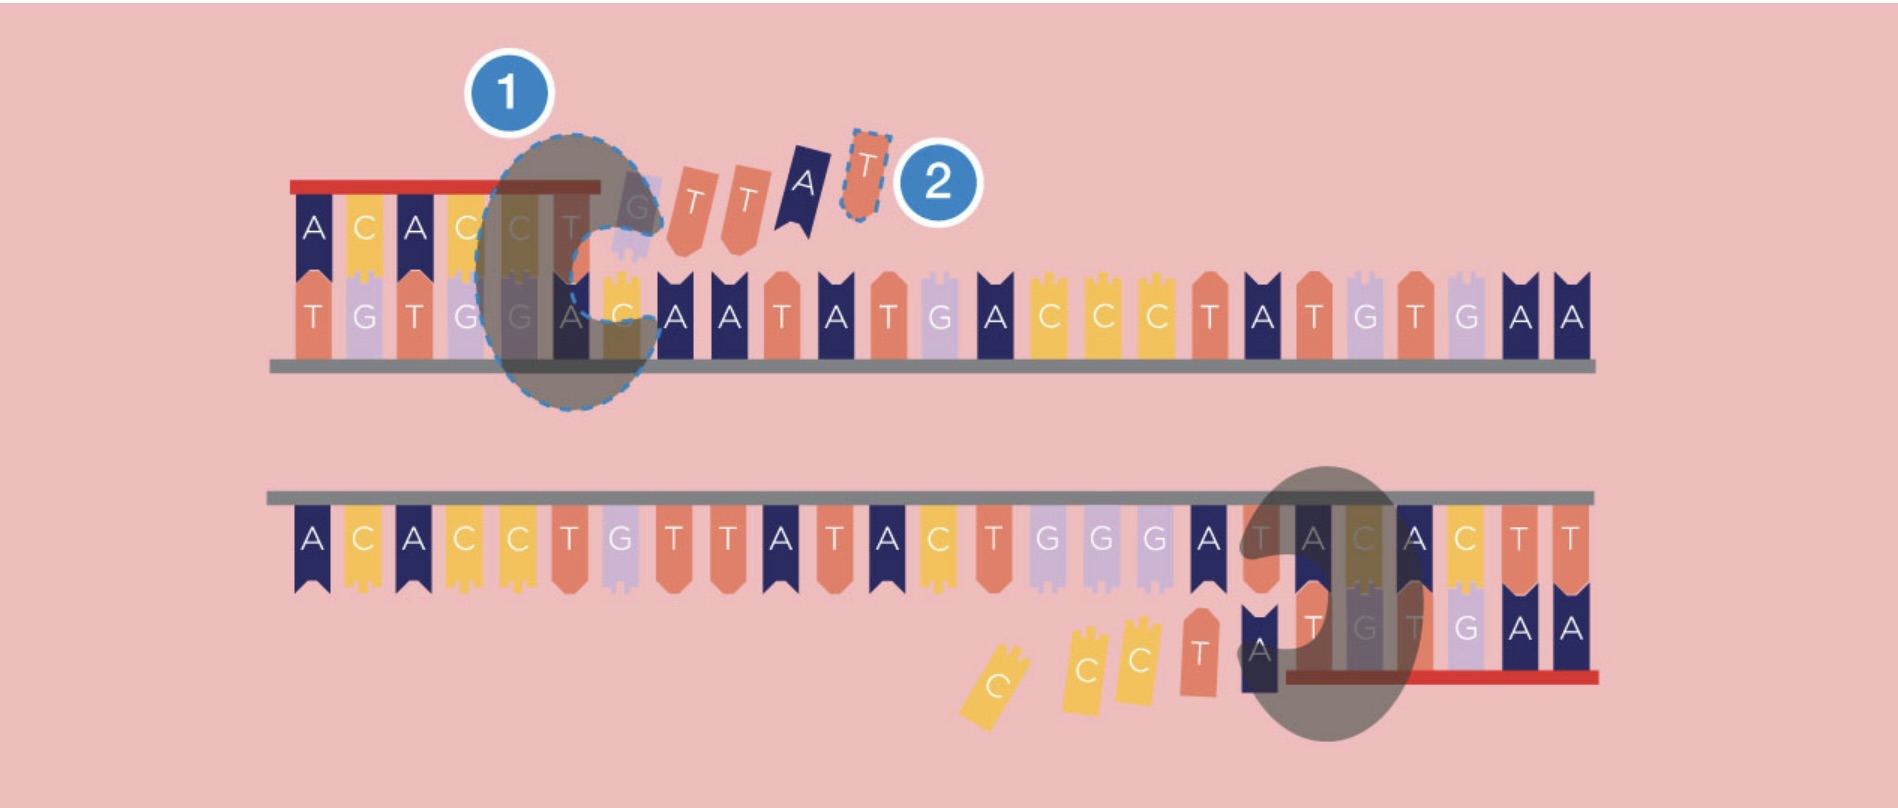
In the next step, the reaction moves to an optimal temperature for the polymerase enzyme (1), from which PCR takes its name, to start working. The polymerase enzyme builds DNA strands, and it will extend the DNA from the primer along the DNA template, creating a new DNA strand, which combines with the single-stranded template to form a double strand. The polymerase enzyme uses dNTPs (2), free DNA nucleotide bases as the building blocks for the new strand.
3. PCR with Biotechnology 101 Kit
For all experiments using PCR in the Biotechnology 101 Kit, you will be provided with a specific set of primers. (1)
In the 101 kit, there are PCR tubes with a freeze-dried PCR master mix bead (2). This bead contains:
- Taq Polymerase, the enzyme which performs the reaction.
- dNTPs (DNA nucleotide bases). These are the DNA bases (A, C, G and T) that are the building blocks of DNA. They are used by the polymerase to construct the new DNA copies.
- Buffer to ensure the right conditions for the reaction.
Finally, you will prepare, as part of each experiment, specific template DNA (3). These need to be mixed in precise proportions, for which you will need the micropipette (4).
Reagents - 6 PCR Primer Mixes for DNA Analysis Projects (200 reactions)
- 5x FIREPol® Master Mix Ready To Load (100 µL, 25 reactions)
- 0.5 g Agarose Tablets (10 tablets)
- 10X TBE Electrophoresis Buffer (50 mL)
- GelGreen® DNA Stain (100 µL)
- 100 bp DNA Ladder (200 µL)
Gel Electrophoresis
Reference
Equipment
- Micropipette
- Bento Lab
- Beaker
- Microwave
Reagents and Consumables - Pipette Tips (4)
- Gel Electrophoresis Tutorial Bag
- Electrophoresis Materials Bag
- Distilled or deionized water (1L) Not included. You can find this on eBay or Amazon.
- Empty 1L plastic or glass bottle. Not included.
Guide
1. What is Gel Electrophoresis?
Gel Electrophoresis is a common analysis method of DNA and it’s the key to visualising your results.
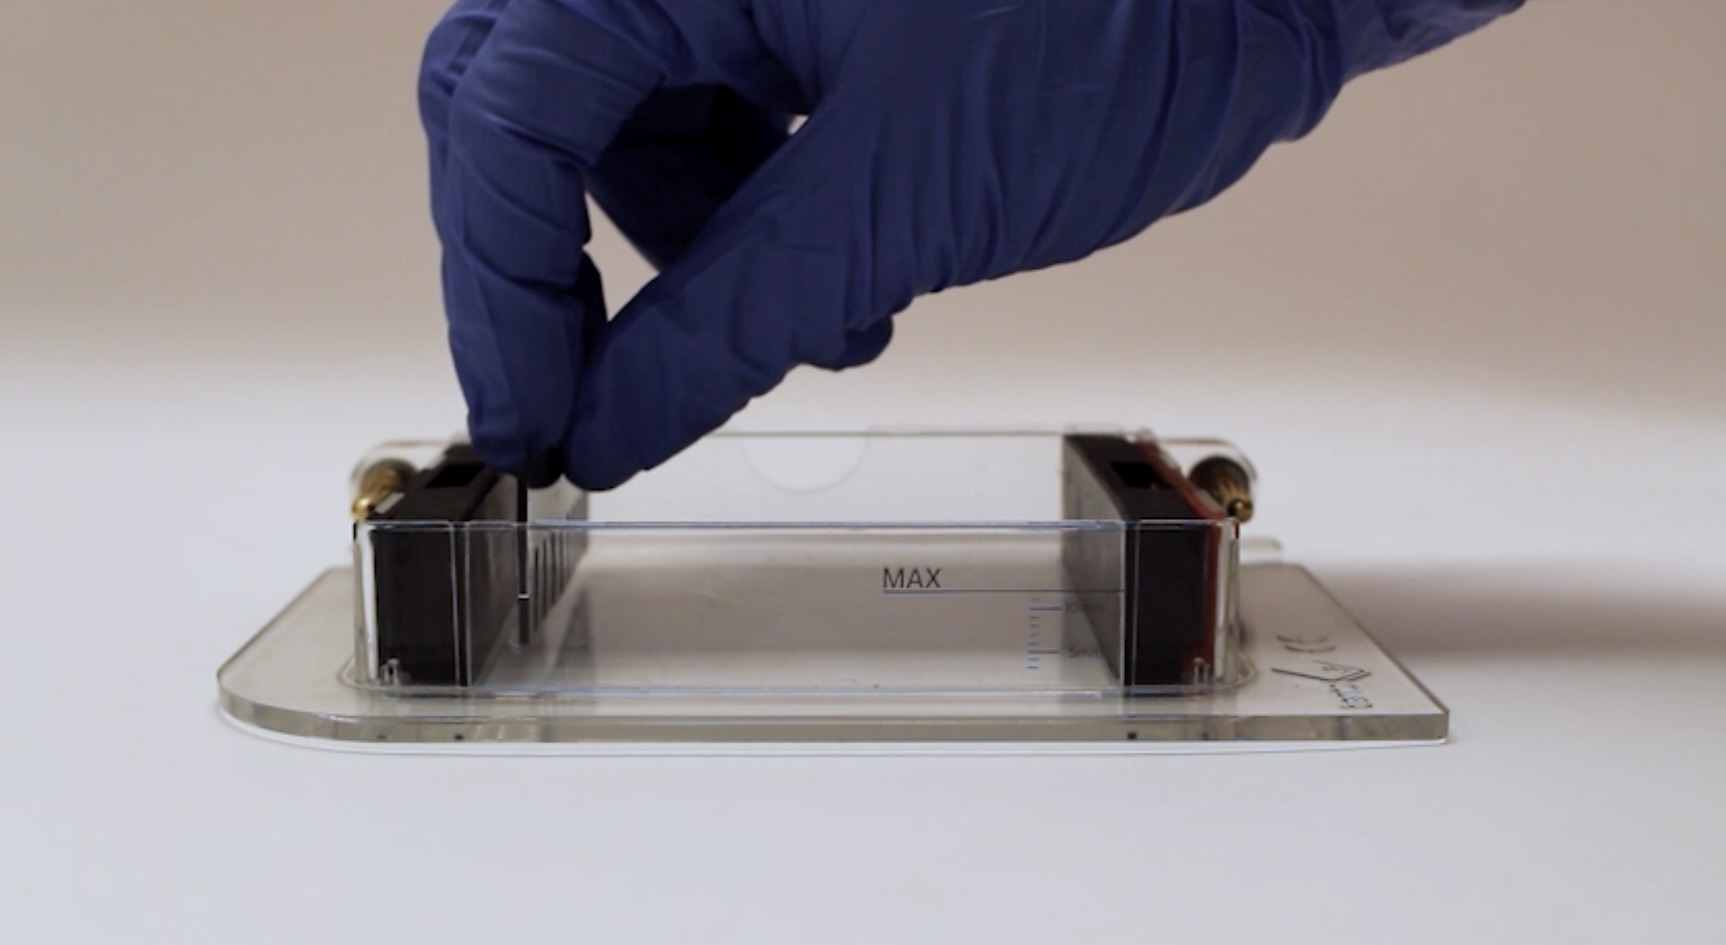
2. The Gel Box
The orange lid seals the gel box when the voltage is applied and also functions as a filter for the transilluminator, to render the fluorescing DNA visible.The base is used to cast and run the gel. It has the red positive electrode, and the black negative one. Each of the electrodes is made of a thin platinum wire.
Two rubber dams are used to create buffer zones around the electrodes during gel casting. There are also combs to create 9 and 12 well gels.
3. Mixing the gels
To make 1% agar gel:
Dissolve agarose powder in the 0.5x TBE Buffer in a beaker.
4. Preparing the gel box for casting
- Slide open the gel box.
- Ensure the black buffer dams are installed correctly, then install one of the combs.
5. Heating the gel solution in the microwave
Heat the solution in a microwave for short bursts of 20-30 seconds.
! Avoid heating the gel solution for too long.
After each burst of microwaving, take our the beaker and swirl the solution. Once bubbles start appearing, the agarose should have dissolved. If you still see visibly solid pieces or strings of agarose, continue until they are dissolved.
6. Pouring the gel
Once the agarose is fully melted and dissolved, let it cool to about 55°C – it should feel hot, but not too hot to touch.
Pour the agarose slowly into the gel box until the 5mm mark.
It will take about 30 min for the gel to solidify at room temperature. To speed up the process, you can also put the gel tray into the fridge.
7. Removing the comb and buffer dams
Remove the comb and the buffer damsafter the gel has solidified.
! Be careful not to damage the gel as you remove the comb and dams. When removing the comb, make sure not to pierce the gel.
8. Gel Buffer
Use your prepared 0.5X TBE buffer solution again, and pour it over the gel until the gel is fully covered. The buffer should reach about 2-3mm above the gel.
That is all of preparing the gell.
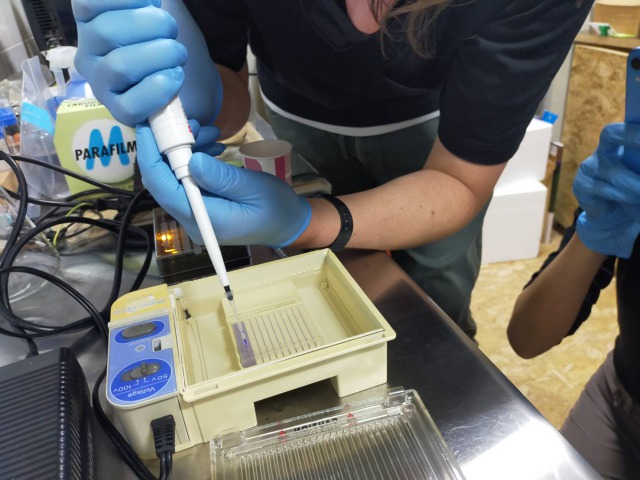
9. Loading the gels
In this step you will load one or several samples you prepared, into the gel you prepared earlier. You will also load the appropriate DNA ladder for the experiment. In the Biotechnology 101 Kit, all experiments are designed for a 100bp ladder.
To load the samples into the wells of the gel, you will need the micropipette and several pipette tips
Set your micropipette to 5μl.
Firstly, load DNA ladder into the well furthest on the left by the micropipette, using a fresh pipette chip.After loading the well, discard the pipette tip.
Next, load the each samples which you prepared into the wells from left to right.
Make a note so that you remember which sample is in which well.
Loading needs careful control. Support the hand holding the pipette with the non-dominant hand for better stability.
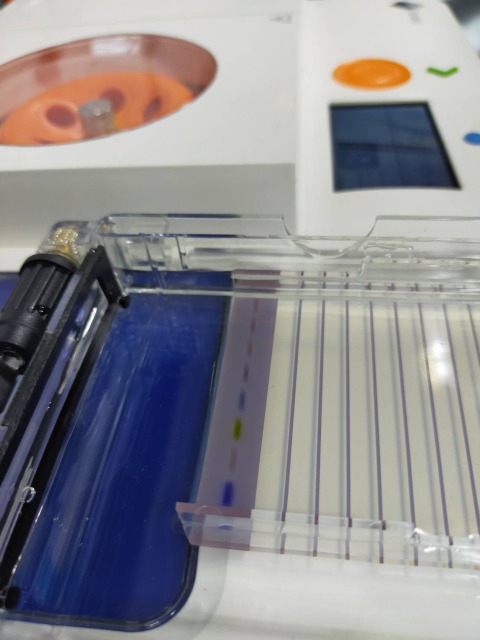
10. Running the gel
Run the gel for 40 minutes to separate the DNA fragments.
- Gently close the gel box by sliding the lid onto the gel tray. Then connect the leads to the Bento Lab’s power supply. Be careful not to spill anything.
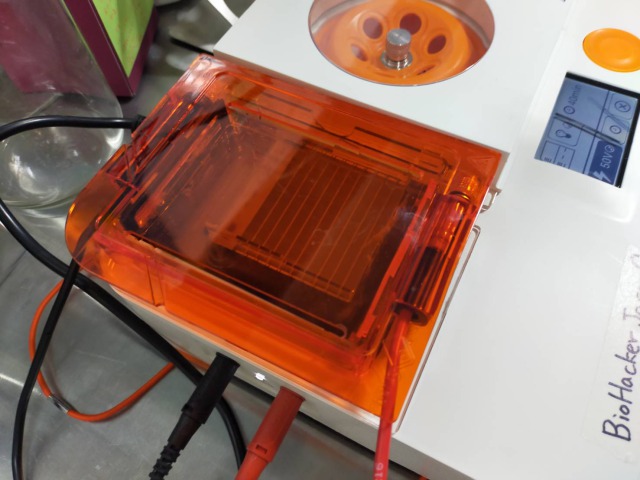
- Set the time and Volt (40min, 50V)
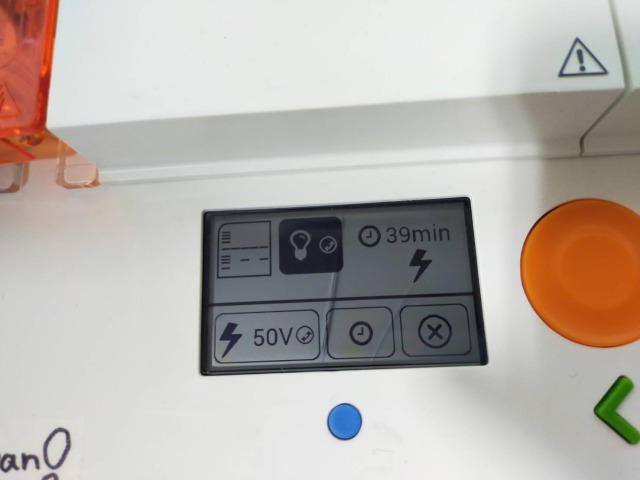
- Start running.
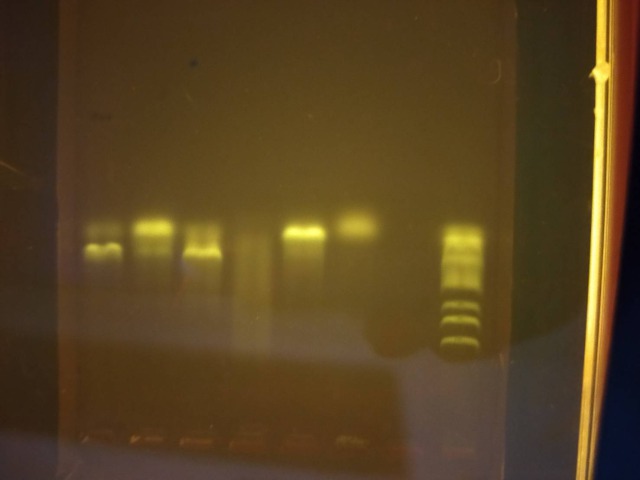
11. Results
This time, we did the DNA Analysis experiment to check whether the one has the ability to digest lactose. Concretely, we searched for the existence of the genetic variation of the gene MCM6, which controls the expression of LCT, the gene that encodes the lactase enzyme. We used a Lactose Intolerance Primer which was part of the reagents of Bento Lab Kit (the Biotechnology 101 Kit).
The ladders appeared could be seen clearly.